8 Best Mini Splits for Garages (November 2026)
The best mini splits for garages include the Pioneer Diamante Pro 18000 BTU 230V for mid-size workshops, the Pioneer Diamante Pro 12000 BTU 230V for smaller wired garages, and the Pioneer Diamante Pro 12000 BTU 115V for 115V garage projects.
On this page (6 sections)
The Pioneer Diamante Pro 18000 BTU 230V is the best mini split for garage use when your space falls within its recommended range and a load calculation supports the size. Choose smaller equipment for a compact garage, and move up only when the building needs more capacity.
A garage door, bare roof and tall ceiling can matter as much as floor area. Start with our guide to choosing a mini split size, or see what size fits a 2 car garage for that layout.
Our picks at a glance
-
1

-
2
 Best for smaller wired garages
Pioneer Diamante Pro 12000 BTU 230V
8.6/10 our score
See it on Amazon -
3
- 4
 Check it
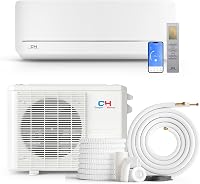
Cooper & Hunter 24000 BTU 230V
Best for remotely managed garages - 5
 Check it
Cooper & Hunter 24000 BTU 230V Heat Pump
Best for cold-weather workshops - 6
 Best for larger DIY projectsCheck it
- 7
 Check it
MRCOOL DIY Select 18000 BTU 230V
Best for Quick Connect installation - 8Check it
Pioneer Diamante Pro 9000 BTU 115V
Best for compact hobby garages
Which is the best mini split for garage comfort?
The Pioneer Diamante Pro 18000 BTU 230V is our first choice for a mid-size garage, while the other picks solve smaller-space, electrical, climate and installation needs. Choose by the garage's load first, then compare controls and installation requirements.
GizmoSage compared capacity, efficiency, operating ranges and installation features for these garage uses. For an overview of how the equipment works, see our mini split heat pump guide.
| Product | Best for | Capacity | Voltage | Recommended area | Our score |
|---|---|---|---|---|---|
| Pioneer Diamante Pro 18000 BTU 230V | mid-size workshops | 18,000 BTU | 230V | 500 to 750 sq ft | 9.0 |
| Pioneer Diamante Pro 12000 BTU 230V | smaller wired garages | 12,000 BTU | 230V | 350 to 500 sq ft | 8.6 |
| Pioneer Diamante Pro 12000 BTU 115V | 115V garage projects | 12,000 BTU | 115V | 350 to 500 sq ft | 8.0 |
| Cooper & Hunter 24000 BTU 230V | remotely managed garages | 24,000 BTU | 230V | 8.0 | |
| Cooper & Hunter 24000 BTU 230V Heat Pump | cold-weather workshops | 24,000 BTU | 230V | 7.7 | |
| MRCOOL Easy Pro 24000 BTU DIY | larger DIY projects | 24,000 BTU | 7.4 | ||
| MRCOOL DIY Select 18000 BTU 230V | Quick Connect installation | 18,000 BTU | 230V | 7.3 | |
| Pioneer Diamante Pro 9000 BTU 115V | compact hobby garages | 9,000 BTU cooling | 115V | 250 to 350 sq ft | 7.2 |
Finding the best mini split for your garage layout
A single indoor head suits one open garage zone better than several spaces divided by walls. Shelving, parked vehicles and partitions can block air even when total capacity is adequate.
The product cards below show the main specifications. The write-ups explain the buyer match and the reasons to pass.
Pioneer Diamante Pro 18000 BTU 230V: Best for mid-size workshops
- 18,000 BTU cooling and heating
- Recommended for 500 to 750 sq ft
- 21.0 SEER2
- Heating down to -4°F
A strong starting point for a mid-size garage used throughout the year. Motorized airflow controls and remote temperature sensing help direct comfort toward your work area.
Pros
- Motorized vertical and horizontal louvers
- I FEEL remote temperature sensing
- Washable filter and self-clean cycle
Cons
- Requires suitable 230V power
- App control needs a separately sold module
Choose this Pioneer for a mid-size garage workshop where you want heating and cooling across an open floor. Its recommended 500 to 750 sq ft range makes it a useful starting point for a garage used as more than vehicle storage.
Motorized up-down and left-right louvers let you direct air toward the occupied part of the room. I FEEL sensing reads temperature near the remote, which helps when your bench sits away from the indoor head.
Keep that remote away from a sunny window, charger or other heat source. Otherwise, the controller may sense a warmer spot than the area where you're working.
The washable filter and self-clean cycle are useful care features, though neither replaces coil cleaning or dust control. Skip this capacity if your garage has a modest load, and budget for the separate AirLink module if phone control matters.
Pioneer Diamante Pro 12000 BTU 230V: Best for smaller wired garages
- 12,000 BTU cooling and heating
- Recommended for 350 to 500 sq ft
- 20.0 SEER2
- Heating down to -4°F
Choose this smaller Pioneer when the garage load fits and your electrical plan supports 230V. It keeps the larger model's airflow controls without buying unnecessary capacity.
Pros
- Dual-axis motorized airflow
- Remote temperature sensing
- Washable filter
Cons
- Requires suitable 230V power
- App module sold separately
Choose the smaller 230V Pioneer for a 350 to 500 sq ft garage whose electrical plan already supports this configuration. It makes sense for an enclosed hobby space where the larger Pioneer would exceed the calculated need.
You still get motorized airflow in both directions and remote temperature sensing. Those controls help aim air around a workbench, but leave a clear path from the head into the room.
Don't choose the larger model just because its seasonal cooling efficiency is higher. A unit that fits the load deserves priority over a small difference in efficiency.
Skip this version when the electrical work makes another correctly sized configuration more practical. Our 9,000 and 12,000 BTU mini split guide can help you compare nearby sizes before you settle on one.
Pioneer Diamante Pro 12000 BTU 115V: Best for 115V garage projects
- 12,000 BTU cooling and heating
- Recommended for 350 to 500 sq ft
- 20.0 SEER2
- 115V power
A smaller-garage option when a qualified electrician confirms that a 115V installation fits your project. Choose it for the electrical match, rather than an assumed performance advantage.
Pros
- 115V configuration
- I FEEL remote temperature sensing
- Installation kit included
Cons
- 115V does not mean any existing outlet is suitable
- App module sold separately
Choose the 115V Pioneer when you need the same smaller-garage capacity as the preceding model and an electrician confirms this voltage suits the job. It has the same recommended area range and seasonal cooling efficiency as its 230V counterpart.
The voltage is the buying distinction, rather than a reason to expect stronger cooling. A suitable circuit, protection and wiring still need to match the equipment's requirements.
Don't assume you can share an existing garage outlet circuit with power tools, a freezer and this system. Have the electrical plan checked before deciding that this version will simplify the project.
This is a good fit for a compact workshop with suitable power and an open airflow path. Skip it if your reason for choosing it is avoiding all electrical work, or if the garage load calls for a different capacity.
Cooper & Hunter 24000 BTU 230V: Best for remotely managed garages
- 24,000 BTU cooling and heating
- 18.7 SEER2
- Smart Kit included
- Professional installation required
The MIA Series suits higher-load garages where included phone control is useful. Have an installer confirm capacity and plan the refrigerant and drain routes before ordering.
Pros
- Smart Kit included
- 16 ft installation connections included
- U.S.-based technical support available
Cons
- Professional installation required
- Freight delivery requires access planning
Choose the Cooper & Hunter MIA for a higher-load garage with remote scheduling needs. Its included Smart Kit lets you adjust settings by phone, which is useful when workshop hours change from day to day.
This is a professional-installation system. Arrange the installer before ordering so the equipment size, electrical work and connection route form one plan.
The included connections are 16 ft long, so measure the actual route around corners and through the wall. A condenser placed directly outside may need less routing than one moved around the side of the garage.
Skip it for a small, well-insulated space that doesn't need this capacity. If winter temperatures fall below its stated heating range, compare mini splits for cold climates before making it your only heat source.
Freight delivery also needs planning. Confirm the accessible drop-off point and how you'll move the equipment to its installation location.
Cooper & Hunter 24000 BTU 230V Heat Pump: Best for cold-weather workshops
- 24,000 BTU heating and cooling
- Smart Kit included
- Professional installation required
- Heating operation at -13°F ambient
The Olivia Series is the colder-weather candidate among these two Cooper & Hunter systems. Confirm its heat output at your local winter design temperature before relying on it for garage heating.
Pros
- Cooper & Hunter specifies heating operation at -13°F
- Smart Kit included
- 16 ft installation connections included
Cons
- Professional installation required
- Operating limit does not specify cold-weather heat output
Choose the Cooper & Hunter Olivia when cold-weather workshop use is central to the purchase and a professional confirms that this capacity fits. Cooper & Hunter specifies heating operation at -13°F ambient, making it the colder-range candidate of these two systems.
Ask for heat output at your local winter design temperature before choosing it. An operating limit alone cannot show whether a drafty garage will reach your desired indoor temperature.
The included Smart Kit suits a garage you want to manage remotely. Plan heating ahead of your work session rather than expecting cold tools, concrete and air to warm at the same speed.
Skip it if the garage load is much smaller, or if your project depends on DIY refrigerant connections. Have the installer confirm the exact indoor and outdoor pairing and its efficiency figures, since the model information uses differing efficiency figures.
MRCOOL Easy Pro 24000 BTU DIY: Best for larger DIY projects
- 24,000 BTU system
- Coverage up to 1,200 sq ft
- 16 ft line set
- Heating and cooling
Consider the Easy Pro for a larger garage project where you want a DIY-oriented system. Review its exact connection procedure before assuming it installs like the DIY Select.
Pros
- Gold Fin condenser coating
- 16 ft line set included
- 1-year labor warranty from IWAE
Cons
- Confirm connection procedure before choosing DIY installation
- Verify winter heating performance for your location
Consider the Easy Pro for a larger DIY-oriented garage project once the installation steps are clear. MRCOOL gives coverage up to 1,200 sq ft, but an upper coverage figure isn't a garage sizing rule.
The Gold Fin condenser coating is a useful feature to discuss if the outdoor location faces corrosion exposure. It doesn't remove the need for suitable placement, cleaning and clear airflow.
This package includes a 1-year labor warranty from IWAE. Read the coverage conditions before choosing who will do each part of the installation.
The important comparison with the DIY Select below is the connection method. Don't assume every system marketed for DIY work uses the same pre-charged Quick Connect arrangement.
Skip the Easy Pro if you haven't confirmed its exact assembly steps, electrical requirements or winter performance. Compare the DIY mini split options if installation method is driving your choice.
MRCOOL DIY Select 18000 BTU 230V: Best for Quick Connect installation
- 18,000 BTU heating and cooling
- For rooms up to 800 sq ft
- 230V power
- Pre-charged Quick Connect line set
The clearest choice here for buyers who want pre-charged Quick Connect refrigerant connections. Electrical work, mounting, drainage and local rules still need a plan.
Pros
- Pre-charged Quick Connect line set
- App and voice control
- No vacuum pump or gauges required for the described connections
Cons
- Requires suitable 230V power
- Confirm heating output for cold-climate use
Choose the DIY Select when pre-charged Quick Connect installation is your main requirement and its capacity fits the garage. MRCOOL describes connections that require no vacuum pump, gauges, brazing or refrigerant handling.
That is a specific installation advantage for a capable homeowner. You'll still need to mount both units, make a wall opening, route the connections and arrange drainage.
Its app and voice controls suit a workshop where you want to adjust conditions before going outside. Plan the electrical supply early rather than treating it as the last task after mounting.
Skip it if the load calculation calls for a smaller system, despite MRCOOL's coverage ceiling of up to 800 sq ft. For winter heating, confirm output and operating limits for this exact system before making it responsible for freeze protection.
DIY refrigerant connections simplify one part of the job. They don't decide who may perform electrical work under local rules.
Pioneer Diamante Pro 9000 BTU 115V: Best for compact hobby garages
- 9,000 BTU cooling
- 10,000 BTU heating
- Recommended for 250 to 350 sq ft
- 115V power
Start here for a compact garage with a modest heating and cooling load. Its smaller capacity makes more sense than a larger unit bought solely for faster cooldown.
Pros
- Smallest cooling capacity in this group
- Motorized vertical and horizontal louvers
- Washable filter and remote sensing
Cons
- Limited capacity for larger or leaky garages
- App module sold separately
Choose the smallest Pioneer for a compact hobby garage with a modest load. Its recommended 250 to 350 sq ft range makes it the first model here to consider before stepping up to a larger size.
A small, insulated garage used for bench work can need less capacity than its appearance suggests. Buying a bigger system solely to recover faster after opening the door can create an oversized system during normal use.
This Pioneer retains the family's motorized airflow controls and remote sensing. Position the head so cabinets or a parked vehicle won't cut off the air path to your work area.
Skip it for a larger open garage unless a load calculation supports the choice. Use our capacity guide when you're between sizes, and account for planned insulation before you commit.
Its lower position in this roundup doesn't make it the wrong choice for a small space. Correct sizing comes before rank.
How should you size a mini split for a garage?
Choose capacity from a heating and cooling load calculation, using floor area as the starting measurement. Ceiling height, insulation, air leaks, windows, sun exposure and climate determine how much work the system must do.
Measure the garage's inside length, width and height. Note any space above it, exposed roof areas, large windows and walls that receive strong afternoon sun.
Tell the installer how you use the garage. Daily bench work with the door closed creates a different comfort goal from occasional vehicle work with the door raised.
Count the space you can actually condition
An open garage is one zone, while a closed storage room or office may need separate attention. Don't count on a wall-mounted head to push enough air through a doorway to condition another enclosed room.
Parked vehicles and tall racks also affect circulation. Sketch their normal positions before deciding where the indoor head belongs.
Our mini split sizing and installation guide covers the factors behind capacity choice. The 2 car garage size guide helps frame a common layout, but the number of parking spaces doesn't set the BTU requirement.
Avoid buying extra capacity as insurance
A larger system isn't a substitute for fixing major air leaks. Oversizing can lead to short runs or poor moisture control when the garage needs only light cooling.
An inverter can reduce output, but every system has a lower operating range. Ask the installer to consider minimum output as well as peak capacity when choosing between sizes.
Include planned insulation in the calculation. Equipment selected for the garage as it is today may be too large after you insulate the roof and seal the door.
How do insulation and climate change the choice?
Insulation reduces the load, while climate determines the hardest conditions the system must handle. Address major gaps and roof heat gain before deciding that the garage needs the largest option.
A metal door in direct sun can add heat, and gaps around the door can admit hot or cold air. Check weather seals and insulation plans without blocking required ventilation.
A concrete slab and stored equipment also take time to change temperature. Comfortable air soon after startup doesn't mean the whole garage has warmed or cooled.
Separate winter operation from winter output
The Pioneers here have a stated heating operating limit of -4°F, while the Cooper & Hunter MIA specifies 5°F. The Olivia extends the stated range lower, but capacity at your outdoor design temperature remains the key comparison.
Ask how much heat the exact system delivers at that temperature and whether backup heat is needed. Confirm winter performance separately for either MRCOOL option.
Read how cold a mini split heat pump can work if you need help interpreting those figures. Don't rely on a minimum operating temperature to protect plumbing or other freeze-sensitive items without a full heating plan.
What should you check before installing a garage mini split?
Confirm electrical supply, mounting positions, connection routing and drainage before ordering. These choices affect the job as much as the indoor unit's dimensions.
Get a written installation scope where practical. It should identify who handles electrical work, permits, refrigerant connections, mounting and startup checks.
Match the circuit to the exact unit
Voltage alone doesn't tell you the required breaker or wire size. Have a qualified electrician use the equipment requirements and local code to plan the supply.
Mention tools, chargers and other garage equipment during that discussion. An existing outlet or nearby panel doesn't prove that the proposed connection is suitable.
For DIY decisions, read whether you can install a mini split yourself. A factory-charged condenser and a DIY connection system are different things.
Leave room for airflow and service
Mount the indoor head where air can travel across the occupied space without hitting a rack immediately. Leave the manual's clearances and enough access to remove filters.
Keep it away from likely impacts from ladders, lumber and overhead storage. Check the garage door and opener through their full travel before choosing the wall position.
The outdoor unit needs the specified clearance and a stable mounting location. Account for snow, roof runoff and service access without boxing it into a tight enclosure.
Plan where water will go
Cooling removes moisture from indoor air, so the condensate needs a reliable drain path. A gravity drain requires suitable fall along its route.
Don't plan to let water spill onto a walking surface or somewhere it can cause damage. If gravity drainage won't work, our mini split condensate pump guide explains the alternative.
In heating mode, outdoor defrost water needs attention too. Ask the installer to plan drainage so it won't create an ice patch near an entrance.
How should you run and care for a garage mini split?
Keep airflow clear, filters clean and operating settings suited to your schedule. Garage dust and frequent door openings make these habits especially useful.
For regular workshop use, a moderate setting with a planned setback can keep recovery manageable. For occasional visits, allow time for the room and its contents to reach a comfortable temperature.
Use controls around your work routine
Close the overhead door while conditioning whenever the task allows. Running hard with the door open sends conditioned air outside and makes the indoor temperature harder to control.
Place a sensing remote near your work area, away from direct sunlight and heat-producing equipment. Use airflow direction to spread air rather than blowing continuously at your face or bench.
Dry mode can help manage moisture under suitable conditions, but it isn't a fixed humidity guarantee. If moisture persists, check drainage, water entry and the garage's air leaks.
Keep workshop dust out of the system
Inspect filters more often during dusty projects and clean them as the manual directs. Let washable filters dry fully before reinstalling them.
Use dust collection for sanding and cutting. A mini split's dust filter isn't a replacement for capturing workshop dust at its source.
Keep the outdoor coil free of leaves and debris, with power off when required by the care instructions. Arrange professional service for reduced output, persistent leaks, unusual noise or ice that doesn't clear normally.
A mini split recirculates room air; it doesn't provide fresh-air ventilation. Never run a vehicle engine in an enclosed garage, and use proper ventilation for work that creates fumes.
Which garage mini split should you choose?
The best mini split for garage comfort is the correctly sized system you can install and maintain properly. Use the product differences to finish the decision after the load calculation.
- Pick the Pioneer 18000 BTU 230V for a mid-size workshop when its capacity fits and you want adjustable airflow and remote sensing.
- Pick a smaller Pioneer for a lower-load garage, choosing between voltage versions with your electrician.
- Pick the Cooper & Hunter MIA for a higher-load space where included phone control matters, or the Olivia when colder-weather operation warrants a closer capacity check.
- Pick the MRCOOL DIY Select for its explicit Quick Connect installation method; consider the Easy Pro for a larger project after confirming its exact installation procedure.
Before ordering, settle the equipment size, electrical work, drain route and winter heating needs. Use the 2 car garage mini split sizing guide to organize those details if that matches your space, then confirm the plan with a qualified HVAC professional.
Our top 3 picks at a glance
-
1
-
2
Best for smaller wired garages
Pioneer Diamante Pro 12000 BTU 230V
8.6/10 our score
See it on Amazon -
3
Frequently asked questions
What size mini split do I need for a garage?
Size a garage mini split with a load calculation that includes floor area, ceiling height, insulation, air leaks and climate. Door use and sun exposure matter too.
Use manufacturer coverage ranges to narrow the options, then have an HVAC professional confirm the capacity before you order.
Is a 12,000 BTU mini split enough for a garage?
A 12,000 BTU mini split can suit a smaller garage when its calculated load fits that capacity. Pioneer recommends both models here for 350 to 500 sq ft.
A tall ceiling, bare roof or leaky garage door can change the result, so don't use floor area as the final sizing rule.
Can I install a garage mini split myself?
You can handle some installations yourself if the system permits it and local rules allow the work. The MRCOOL DIY Select includes pre-charged Quick Connect connections, while both Cooper & Hunter systems require professional installation.
Electrical work and permits remain separate questions, even when the refrigerant connections are designed for DIY assembly.
Will a mini split heat a garage in freezing weather?
A suitable mini split can heat a garage below freezing if its cold-weather output meets the building's heat loss. The minimum operating temperature tells you when it can run, rather than how much warmth it delivers.
Compare heating capacity at your local winter design temperature and plan backup heat if needed.
Should a garage mini split stay on all the time?
Use a steady, moderate setting for a garage you occupy often, and consider a setback for long periods without use. The right schedule depends on weather, insulation, humidity and what you store.
Avoid assuming continuous operation is always cheaper, and allow recovery time before you start work.