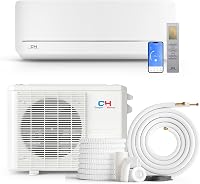
MRCOOL vs Pioneer Mini Splits: DIY or Pro Install? (November 2026)
In this MRCOOL vs Pioneer mini split comparison, choose MRCOOL for DIY refrigerant connections or Pioneer for higher seasonal efficiency. Match either system to your room's heating and cooling load, then confirm the installation plan before buying.
On this page (12 sections)
- MRCOOL vs Pioneer mini split: which should you choose?
- Which system makes installation easier?
- How should you size these systems for your room?
- Does Pioneer's higher efficiency justify choosing it?
- Can either system serve as your main winter heat source?
- What should you plan before either system arrives?
- What comes with each system, and what needs extra planning?
- Which controls will you use day to day?
- How much routine care should you expect?
- Which buying mistakes should you avoid?
- Sources and comparison scope
- The final MRCOOL vs Pioneer mini split decision
Choose MRCOOL for DIY refrigerant connections or Pioneer for higher seasonal efficiency with qualified installation. This MRCOOL vs Pioneer mini split comparison covers the DIY Select and Diamante Pro, both single-zone, 18,000 BTU heat pumps that require 230V power.
The deciding question is how you'll install and use the system. An accessible DIY project favors MRCOOL, while a room heated and cooled most days gives Pioneer's efficiency advantage more weight.
Before choosing either, confirm that this capacity fits the space. A better connection method or efficiency figure won't fix a system that's too large, too small or poorly placed.


MRCOOL vs Pioneer mini split: which should you choose?
Choose MRCOOL if simpler refrigerant connections make your installation practical; choose Pioneer if efficiency matters more than doing that work yourself. Start with room sizing, then compare the complete installation plan.
MRCOOL fits a capable homeowner improving one open room, addition or workshop with an easy route between the units. Its appeal is strongest when you can handle the physical work and arrange electrical help separately.
Pioneer fits a room used through long cooling or heating seasons, especially when an HVAC installer is already part of your plan. Its airflow controls also suit buyers who want to adjust where conditioned air goes.
Skip both if you need separate temperature control in several closed rooms. These are single-zone systems, so one indoor head shouldn't be treated as a whole-home solution without checking the layout and loads.
For background on how indoor and outdoor units work together, start with our mini split heat pump guide.
MRCOOL vs Pioneer: when is neither the right mini split?
Neither is the right choice until capacity and installation fit your property. A small, well-insulated bedroom may need less output, while a drafty space with large doors may need a different solution.
Renters also need permission for wall penetrations, exterior equipment and electrical changes. Resolve those limits before ordering equipment that requires permanent installation.
Which system makes installation easier?
MRCOOL simplifies the refrigerant connection with its pre-charged Quick Connect line set. That setup requires no vacuum pump, gauges, brazing or refrigerant handling for the connection.
This is useful when the route is straightforward and you can follow the manual closely. It removes a specialized part of the job, but the wall opening, supports, drain and power still need careful work.
Pioneer includes installation materials, but its factory-charged outdoor condenser doesn't make the entire connection process equivalent to MRCOOL's system. Arrange an installer who can complete the refrigerant work according to the exact manual.
Before buying Pioneer, ask whether your chosen contractor installs customer-purchased equipment and can use the included kit. Settle who supplies any extra materials and who handles startup and later service.
For either model, plan how you'll move and secure the outdoor unit. A difficult roof location or high wall mount can make professional installation worthwhile even when the refrigerant connections are DIY-oriented.
Our guide to installing a mini split yourself helps you separate manageable tasks from work that needs qualified help.
How should you size these systems for your room?
Use a heating and cooling load calculation, with floor area as a starting point. MRCOOL describes coverage up to 800 square feet, while Pioneer recommends 500 to 750 square feet.
Both have 18,000 BTU cooling capacity, so the different coverage guidance isn't proof that MRCOOL has more cooling output. The room's heat gain and heat loss determine the capacity it needs.
A sunroom with broad windows can have a very different load from a shaded room of the same size. Ceiling height, air leaks, insulation and local weather also matter.
Garages need special attention because door openings can bring in large amounts of outdoor air. Improving gaps and insulation may change the equipment size you need.
Oversizing can cause short operating cycles and weak moisture removal, especially in mild weather. Inverter operation helps a system adjust output, but it doesn't make any capacity suitable for any room.
Use our guide to choosing the right mini split size before shopping. If your load points to this capacity range, compare other 18,000 and 24,000 BTU mini splits too.
Does Pioneer's higher efficiency justify choosing it?
Pioneer is the stronger efficiency choice for frequent heating and cooling. It has 21.0 SEER2 and 9.5 HSPF2, compared with MRCOOL's figures of up to 17.3 SEER2 and 8.5 HSPF2.
SEER2 measures seasonal cooling efficiency, while HSPF2 measures seasonal heating efficiency. Higher figures mean better efficiency under the relevant standard conditions.
That advantage deserves more weight in a daily-use office or main living area than in a workshop used occasionally. More operating hours give efficiency differences more chances to affect electricity use.
Compare complete installation quotes, not equipment alone. Include electrical work, mounting, drainage and any extra line routing before deciding which system makes better use of your budget.
Don't turn the seasonal figures into a promised reduction in your bill. Weather, thermostat settings and installation quality affect real use, and your current heating or cooling equipment also changes the comparison.
Can either system serve as your main winter heat source?
Pioneer gives a clearer cold-weather starting point, but neither should become your only heat source without a winter load check. Pioneer specifies heating operation down to -4°F and has NEEP ASHP recognition for cold-climate capability.
An operating limit tells you when equipment can run, not how much heat it delivers at that temperature. Ask for heating output at your area's winter design temperature and compare it with the room's heat loss.
Don't assume MRCOOL shares Pioneer's low-temperature limit. If winter heating is the main reason for buying, confirm the exact MRCOOL model's operating range and capacity at low temperatures before choosing it.
Plan the outdoor unit's position for snow, drainage and service access. Follow the manual's clearances and keep the unit out of places where roof runoff or drifting snow can block it.
Our guide to how mini splits work in cold weather explains the difference between continued operation and enough heat for the room.
What should you plan before either system arrives?
Settle the unit locations, line route, drainage and electrical work before ordering. These details determine whether the included materials suit your home and whether the project stays simple.
Place the indoor unit for airflow and access
Choose a position where air can reach the occupied part of the room without furniture blocking it. Avoid aiming the air directly at a bed or desk when another suitable position is available.
Leave the manual's required space around the head and room to reach the filter. A visually tidy location is a poor choice if cleaning requires moving heavy furniture each time.
Map the route between the units
Measure the actual route, including bends and changes in height. Confirm the permitted line length, elevation difference and bend requirements in the exact manual.
Avoid choosing the outdoor position only after the wall opening is made. The two locations need to work together, and excess line should be managed according to the installation instructions.
Give condensate a reliable path
A cooling mini split removes moisture that must drain away. Plan a continuous downward route where gravity drainage is possible, without sags that hold water.
If the route can't drain by gravity, settle the pump arrangement before mounting the head. Also choose a discharge point that won't leave water on a walkway or damage nearby materials.
Confirm the electrical scope
Both systems need 230V power, but voltage alone doesn't define the circuit. Have an electrician check the model-specific circuit, wiring and disconnect requirements rather than reusing a circuit by guesswork.
What comes with each system, and what needs extra planning?
MRCOOL centers its package on the DIY connection, while Pioneer includes a broader set of installation and finishing materials. Neither package removes the need to check your wall, route and mounting needs.
MRCOOL includes its Quick Connect line set and a remote. Confirm the included line length against your planned route before committing to the indoor and outdoor positions.
Pioneer's kit includes an insulated line set, signal cable, drain hose, wall sleeve, putty, sealer, wrapping tape, drain spout and rubber feet. The package also includes the indoor head, outdoor condenser and handheld remote.
A kit can still need project-specific additions, such as mounting supports or a different drainage arrangement. Ask the installer to identify those needs before work starts.
For a closer explanation of charging and connection methods, read whether DIY mini splits come pre-charged.
Which controls will you use day to day?
MRCOOL suits buyers who want app and voice control; Pioneer suits buyers who value remote sensing and adjustable airflow. Choose the controls you'll use regularly, rather than counting modes.
MRCOOL supports the Comfort App and voice assistants. MRCOOL also specifies sound as low as 18.5 dB(A) in silent mode, which applies to that mode rather than every fan speed.
Pioneer's I FEEL function senses temperature near the handheld remote. Keep the remote near the occupied area, away from direct sunlight, a warm appliance or the unit's air stream.
Pioneer has motorized up-down and left-right louvers, plus Turbo, Mute, Eco, Sleep, Timer and Memory functions. Optional AirLink app control needs a separately sold module, so include that component if phone control is essential.
For either system, begin with a steady, comfortable setpoint and adjust the airflow before making large temperature changes. Setting cooling far below your target isn't a reliable way to reach the target sooner.
How much routine care should you expect?
Plan regular filter care, clear airflow and drain checks for either system. Access for those jobs matters as much as the first installation.
Pioneer has a washable, reusable dust filter and a self-clean cycle. Follow the manual's washing and drying instructions, and keep regular cleaning and professional service in your plan.
For MRCOOL, follow its manual for filter cleaning and service steps. Don't assume filter parts or cleaning methods transfer between the two brands.
Check filters more often in a dusty workshop or garage. Dust buildup restricts airflow, so a fixed calendar reminder may need adjusting to match the room.
Keep leaves and other debris clear of the outdoor unit and avoid storing items against it. If water drips indoors, airflow weakens or unusual noise develops, arrange service rather than covering up the symptom with a different setting.
Which buying mistakes should you avoid?
Avoid choosing by coverage claims, box contents or DIY branding alone. The complete project has to fit your room, skill level and service plan.
- Buying before arranging labor: confirm an installer will take the job if you need one, especially for equipment you order yourself.
- Ignoring drain routing: a convenient wall position can create an awkward water removal problem.
- Expecting one head to serve closed rooms: doors and walls limit air movement between spaces.
- Choosing solely by quiet-mode sound: placement and fan speed also affect what you hear.
- Treating included parts as a complete project: mounting, power and site-specific materials still need a plan.
If DIY installation remains your priority after those checks, compare our best DIY mini splits. That helps you choose a connection approach before narrowing the equipment.
Sources and comparison scope
This comparison covers these 2 specific systems, rather than every MRCOOL or Pioneer model. GizmoSage compared their specifications, connection methods, included parts and controls.
See it on Amazon for the MRCOOL DIY Select.
See it on Amazon for the Pioneer Diamante Pro.
The final MRCOOL vs Pioneer mini split decision
Pick MRCOOL when a manageable DIY project is the reason you're choosing a mini split; pick Pioneer when frequent use makes seasonal efficiency the priority. Skip either if the load calculation or installation route points to a different system.
Before ordering, have a room load estimate, a measured line route and a clear division of installation work. Those 3 checks turn a brand preference into a workable project.
For other brand matchups, visit our mini split comparison guides.
Frequently asked questions
Is MRCOOL or Pioneer better for DIY mini split installation?
MRCOOL is the clearer DIY choice because its DIY Select system includes a pre-charged Quick Connect line set. That connection avoids a vacuum pump, gauges, brazing and refrigerant handling, but you still need suitable mounting, drainage and power, plus qualified help for work required by local rules.
Does the Pioneer Diamante Pro come with an installation kit?
Yes, Pioneer includes an insulated line set, signal cable, drain hose, wall sleeve and finishing materials. Its package also includes the indoor unit, factory-charged outdoor condenser and remote, but the kit isn't a substitute for the skills and equipment needed to complete installation according to the manual and local requirements.
Which is more efficient, MRCOOL or Pioneer?
Pioneer has higher seasonal efficiency: 21.0 SEER2 for cooling and 9.5 HSPF2 for heating, compared with MRCOOL's figures of up to 17.3 SEER2 and 8.5 HSPF2. Those measures favor Pioneer for frequent use, while actual electricity use also depends on climate, sizing, insulation and temperature settings.
Can either 18,000 BTU mini split cool an 800-square-foot room?
MRCOOL describes coverage up to 800 square feet, while Pioneer recommends 500 to 750 square feet. Neither range replaces a room load calculation, which accounts for insulation, windows, ceiling height and climate, so don't select either system for a large room based on floor area alone.
Do both mini splits need 230V power?
Yes, both systems require 230V power, and the circuit must meet the exact model's electrical requirements. Have a qualified electrician assess the circuit, disconnect and connection work before ordering, rather than assuming an existing outlet or nearby appliance circuit can safely serve the new system.